 Các hàm xử lý chuỗi trong Javascript (cắt / tách / nối chuỗi ..)
  Chia lấy phần dư / chia lấy phần nguyên trong javascript
  Các cách khai báo biến trong Javascript
  Các sự kiện (Event) trong Javascript
 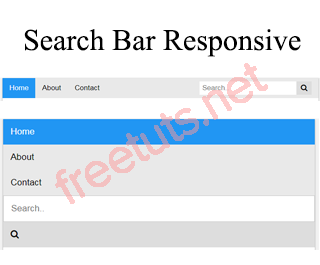 Hướng tạo thanh search bar bằng CSS
  Hàm array.slice() trong Javascript
  Tính tổng hai số bằng Javascript (cộng hai số)
  Cách khai báo biến trong PHP, các loại biến thường gặp
  Download và cài đặt Vertrigo Server
  Thẻ li trong HTML
  Thẻ article trong HTML5
  Cấu trúc HTML5: Cách tạo template HTML5 đầu tiên
  Cách dùng thẻ img trong HTML và các thuộc tính của img
  Thẻ a trong HTML và các thuộc tính của thẻ a thường dùng
 Gửi HTTP POST Request với dữ liệu người dùng nhập trong VueJS 2
Trong bài tập này, mình sẽ tập trung vào việc sử dụng Vue Router để tạo một form, cho phép người dùng nhập liệu và gửi một HTTP POST request với dữ liệu từ form đó. Sự kết hợp giữa VueJS và Axios (hoặc Fetch API) sẽ giúp chúng ta hiểu rõ hơn về cách tích hợp Vue Router vào quá trình tương tác với các dịch vụ web từ ứng dụng của chúng ta.
Gửi HTTP POST Request với dữ liệu người dùng nhập trong VueJS 2
Mình sẽ bắt đầu bằng việc cài đặt Axios, một thư viện JavaScript phổ biến giúp mình thực hiện các yêu cầu HTTP một cách dễ dàng. Sau đó, mình sẽ tạo một component Vue để xử lý việc nhập liệu từ người dùng và gửi một HTTP POST request đến một API công khai. Kết quả trả về từ API sẽ được hiển thị để người dùng có thể xem.
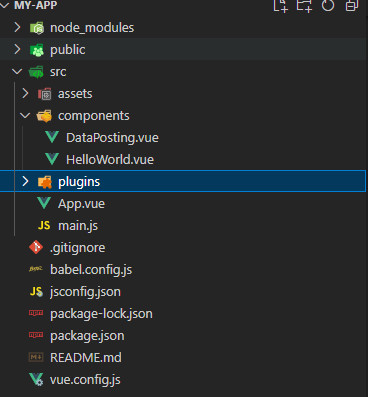
Cấu trúc thư mục
Cài đặt Axios
# Sử dụng npm
npm install axios
Tạo Component Vue
components/DataPosting.vue
<template>
<div>
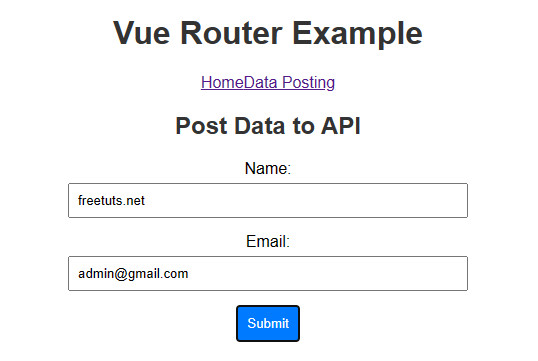
<h2>Post Data to API</h2>
<form @submit.prevent="postData">
<label for="name">Name:</label>
<input type="text" id="name" v-model="userData.name" required>
<label for="email">Email:</label>
<input type="email" id="email" v-model="userData.email" required>
<button type="submit">Submit</button>
</form>
<div v-if="responseMessage">
<h3>Response from API:</h3>
<p>{{ responseMessage }}</p>
</div>
</div>
</template>
<style>
div {
max-width: 400px;
margin: 0 auto;
}
h2 {
color: #333;
}
form {
margin-top: 20px;
}
label {
display: block;
margin-bottom: 5px;
}
input {
width: 100%;
padding: 8px;
margin-bottom: 15px;
box-sizing: border-box;
}
button {
background-color: #007BFF;
color: #fff;
padding: 10px;
border: none;
cursor: pointer;
}
button:hover {
background-color: #0056b3;
}
.response-container {
margin-top: 20px;
}
h3 {
color: #333;
}
p {
margin: 10px 0;
color: #007BFF;
}
</style>
<script>
import axios from 'axios';
export default {
data() {
return {
userData: {
name: '',
email: '',
},
responseMessage: '',
};
},
methods: {
postData() {
// Gửi HTTP POST request khi người dùng submit form
axios.post('https://jsonplaceholder.typicode.com/posts', this.userData)
.then(response => {
// Hiển thị thông báo hoặc kết quả trả về từ API
this.responseMessage = response.data.title;
})
.catch(error => {
console.error('Error posting data:', error);
});
},
},
};
</script>
Cấu hình Routes
src/main.js
import Vue from 'vue';
import App from './App.vue';
import VueRouter from 'vue-router';
import DataPosting from './components/DataPosting.vue';

Vue.config.productionTip = false;

Vue.use(VueRouter);

const routes = [
  { path: '/', component: App },
  { path: '/data-posting', component: DataPosting },
];

const router = new VueRouter({
  routes,
  mode: 'history',
});

new Vue({
  render: h => h(App),
  router,
}).$mount('#app');
Sử dụng Component trong Template
App.vue
<template>
  <div id="app">
    <h1>Vue Router Example</h1>
    <router-link to="/">Home</router-link>
    <router-link to="/data-posting">Data Posting</router-link>

    <!-- Hiển thị component tương ứng với route -->
    <router-view></router-view>
  </div>
</template>

<script>
export default {
  name: 'App',
};
</script>

<style>
#app {
  font-family: 'Arial', sans-serif;
  text-align: center;
  margin-top: 20px;
}

h1 {
  color: #333;
}

router-link {
  margin: 0 10px;
  text-decoration: none;
  color: #007BFF;
  font-weight: bold;
}

router-link:hover {
  text-decoration: underline;
}
</style>
Chạy ứng dụng
npm run serve
Bây giờ, khi bạn truy cập vào route "/data-posting", bạn sẽ thấy một form cho phép bạn nhập liệu và gửi một HTTP POST request với dữ liệu nhập từ form. Kết quả trả về từ API sẽ được hiển thị.

Trong bài tập này, mình đã tìm hiểu cách sử dụng Vue Router để tạo một form đơn giản và gửi dữ liệu từ form đó đến một API thông qua HTTP POST request. Việc này giúp mình không chỉ làm quen với Vue Router mà còn hiểu rõ về cách tích hợp VueJS với các thư viện ngoại vi như Axios để tương tác linh hoạt với các dịch vụ web. Hãy tiếp tục tìm hiểu những khả năng mà VueJS và Vue Router mang lại cho quá trình phát triển ứng dụng web của bạn.
Bài giải
-------------------- ######## --------------------
Câu hỏi thường gặp liên quan:
- Gửi HTTP GET Request và hiển thị dữ liệu trong VueJS 2
- Gửi HTTP POST Request với dữ liệu người dùng nhập trong VueJS 2
- Sử dụng Axios Interceptors trong VueJS 2
- Lưu trữ dữ liệu vào Vuex trong VueJS 2
- Thực hiện các loại Request (GET, POST, PUT, DELETE) trong VueJS 2