 Xây dựng chức năng đăng nhập và đăng ký với php và mysql
  Bảng mã ASCII chuẩn các hệ nhị phân - thập phân - thập lục phân
  Cách khai báo biến trong PHP, các loại biến thường gặp
  Các kiểu dữ liệu trong PHP và các loại biến tương ứng
  Bài 26: Hàm isset() và empty() trong php
  Bài 19: Phương thức GET và POST trong php
  Download và cài đặt Vertrigo Server
  Bài 20: Các hàm xử lý chuỗi trong php
  Thẻ li trong HTML
  Thẻ article trong HTML5
  Cấu trúc HTML5: Cách tạo template HTML5 đầu tiên
  Cách dùng thẻ img trong HTML và các thuộc tính của img
  Thẻ a trong HTML và các thuộc tính của thẻ a thường dùng
 Bài 10: PHP trang tin tức - Các chức năng của hình ảnh admin
Xin chào tất cả các bạn, chào mừng các bạn đã quay trở lại với series hướng dẫn xây dựng trang tin tức bằng PHP. Ở bài trước chúng ta đã hoàn thành xong các chức năng của chuyên mục rồi, hôm nay mình sẽ hướng dẫn các bạn xây dựng các chức năng của hình ảnh. Bây giờ chúng ta bắt đầu thôi!

1. Khái quát
Một trong những phần không thể thiếu của trang tin tức đó là hình ảnh (tiếng anh là images). Một bài viết mà không có hình ảnh minh hoạ thì rất là nhàm chán phải không nào! Cho nên vì thế chúng ta sẽ xây dựng chức năng này cho ứng dụng của mình.
Các đặc điểm và chức năng trong phần này là:
- Upload ảnh
- Kiểm tra lượng ảnh upload tối đa trong một lần.
- Kiểm tra kích thước (size) của ảnh khi upload.
- Kiểm tra đuôi mở rộng của ảnh khi upload.
- Xoá ảnh
- Bảng hiển thị danh sách hình ảnh
- Không phần quyền tài khoản (vì các tác giả có thể upload hình ảnh cho bài viết của mình)
2. Tạo table hình ảnh và folder lưu trữ
Các bạn tạo table images và chạy lênh SQL sau:
Bài viết này được đăng tại [free tuts .net]
CREATE TABLE `images` (
  `id_img` int(11) NOT NULL,
  `url` text COLLATE utf8_unicode_ci NOT NULL,
  `type` varchar(5) COLLATE utf8_unicode_ci NOT NULL,
  `size` int(11) NOT NULL,
  `date_uploaded` datetime NOT NULL
) ENGINE=InnoDB DEFAULT CHARSET=utf8 COLLATE=utf8_unicode_ci;
ALTER TABLE `images`
  ADD PRIMARY KEY (`id_img`);
ALTER TABLE `images`
  MODIFY `id_img` int(11) NOT NULL AUTO_INCREMENT;
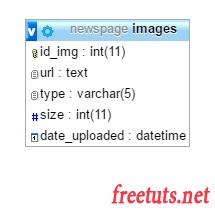
Trong đó:
url: là đường dẫn của hình ảnh, bao gồm domain (Ví dụ: http://domain.com/upload/image.jpg)type: là đuôi mở rộng của ảnh (Ví dụ: jpg, png, jpeg, gif, ...)size: là kích thước của ảnh, đơn vị là byte
Để tạo folder chứa các hình ảnh, các bạn tạo cho mình folder upload cùng cấp với folder admin. Mình không để folder này trong folder admin vì khi người dùng xem url ảnh thì sẽ thấy đường dẫn /admin/upload/ nên rất là nguy hiểm.
3. Phân trang hình ảnh
Trong phần hình ảnh này, chúng ta sẽ phân ra 2 trang:
- Trang hiển thị danh sách hình ảnh (http://domain.com/admin/photos/)
- Trang upload hình ảnh (http://domain.com/admin/photos/add)
Các bạn mở file admin/templates/photos.php lên và dán nội dung sau:
<?php
// Nếu đăng nhập
if ($user)
{
echo '<h3>Hình ảnh</h3>';
// Lấy tham số ac
if (isset($_GET['ac']))
{
$ac = trim(addslashes(htmlspecialchars($_GET['ac'])));
}
else
{
$ac = '';
}
// Nếu có tham số ac
if ($ac != '')
{
// Trang upload hình ảnh
if ($ac == 'add')
{
// Dãy nút của upload hình ảnh
echo
'
<a href="' . $_DOMAIN . 'photos" class="btn btn-default">
<span class="glyphicon glyphicon-arrow-left"></span> Trở về
</a>
';
// Content upload hình ảnh
}
}
// Ngược lại không có tham số ac
// Trang danh sách hình ảnh
else
{
// Dãy nút của danh sách hình ảnh
echo
'
<a href="' . $_DOMAIN . 'photos/add" class="btn btn-default">
<span class="glyphicon glyphicon-plus"></span> Thêm
</a>
<a href="' . $_DOMAIN . 'photos" class="btn btn-default">
<span class="glyphicon glyphicon-repeat"></span> Reload
</a>
<a class="btn btn-danger" id="del_img_list">
<span class="glyphicon glyphicon-trash"></span> Xoá
</a>
';
// Content danh sách hình ảnh
}
}
// Ngược lại chưa đăng nhập
else
{
new Redirect($_DOMAIN); // Trở về trang index
}
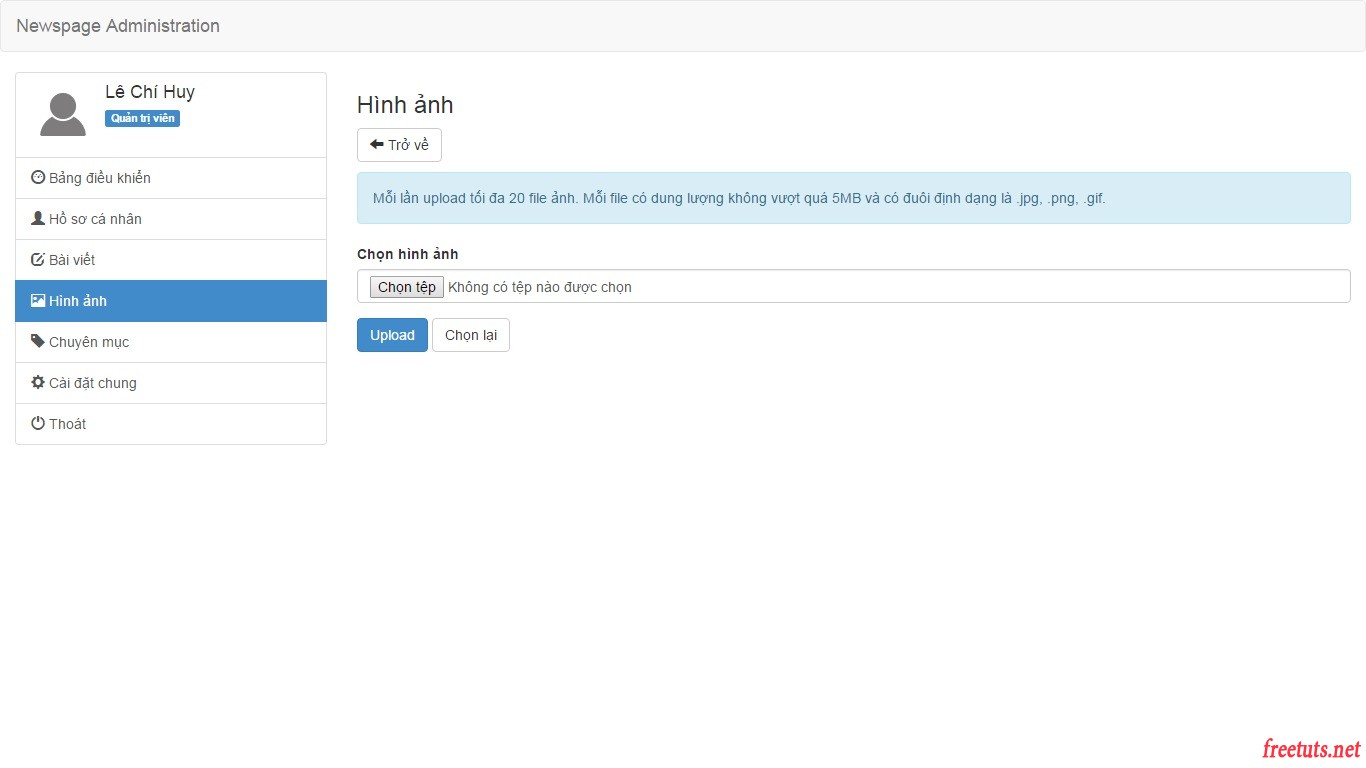
?>4. Upload hình ảnh
Các bạn vào đường dẫn http://domain.com/admin/photos/add để bắt đầu làm nhé!
Xây dựng template
Các bạn mở file admin/templates/photos.php lên và dán đoạn code này vào bên dưới dòng // Content upload hình ảnh:
echo
'
    <p class="form-up-img">
        <div class="alert alert-info">Mỗi lần upload tối đa 20 file ảnh. Mỗi file có dung lượng không vượt quá 5MB và có đuôi định dạng là .jpg, .png.gif., </div>
        <form action="' . $_DOMAIN . 'photos.php"method="POST" id="formUpImg" enctype="multipart/form-data" onsubmit="return false;">
            <div class="form-group">
                <label>Chọn hình ảnh</label>
                <input type="file" class="form-control" accept="image/*" name="img_up[]" multiple="true" id="img_up" onchange="preUpImg();">
            </div>
            <div class="form-group box-pre-img hidden">
                <p><strong>Ảnh xem trước</strong></p>
            </div>
            <div class="form-group hidden box-progress-bar">
                <div class="progress">
                    <div class="progress-bar" role="progressbar"></div>
                </div>
            </div>
            <div class="form-group">
                <button type="submit" class="btn btn-primary">Upload</button>
                <button class="btn btn-default" type="reset">Chọn lại</button>
            </div>
            <div class="alert alert-danger hidden"></div>
        </form>
    </p>
'; Viết Ajax gửi dữ liệu
Mở file admin/js/form.js lên và copy các đoạn code sau:
Đầu tiên là chức năng xem ảnh trước khi upload:
// Xem ảnh trước
function preUpImg() {
	img_up = $('#img_up').val();
	count_img_up = $('#img_up').get(0).files.length;
	$('#formUpImg .box-pre-img').html('<p><strong>Ảnh xem trước</strong></p>');
	$('#formUpImg .box-pre-img').removeClass('hidden');

	// Nếu đã chọn ảnh
	if (img_up != '')
	{
		$('#formUpImg .box-pre-img').html('<p><strong>Ảnh xem trước</strong></p>');
		$('#formUpImg .box-pre-img').removeClass('hidden');
		for (i = 0; i <= count_img_up - 1; i++)
		{
			$('#formUpImg .box-pre-img').append('<img src="' + URL.createObjectURL(event.target.files[i]) + '" style="border: 1px solid #ddd; width: 50px; height: 50px; margin-right: 5px; margin-bottom: 5px;"/>');
		}
	}
	// Ngược lại chưa chọn ảnh
	else
	{
		$('#formUpImg .box-pre-img').html('');
		$('#formUpImg .box-pre-img').addClass('hidden');
	}
}ObURL.createjectURL() là một hàm API của brower, dùng để tạo các URL file. Các bạn có thể tham khảo thêm tại đây.
Tiếp theo là nút reset form upload ảnh:
// Nút reset form  hình ảnh
$('#formUpImg button[type=reset]').on('click', function() {
	$('#formUpImg .box-pre-img').html('');
	$('#formUpImg .box-pre-img').addClass('hidden');
});// Upload hình ảnh
$('#formUpImg').submit(function(e) {
img_up = $('#img_up').val();
count_img_up = $('#img_up').get(0).files.length;
error_size_img = 0;
error_type_img = 0;
$('#formUpImg button[type=submit]').html('Đang tải ...');
// Nếu có chọn ảnh
if (img_up) {
e.preventDefault();
// Kiểm tra dung lượng ảnh
for (i = 0; i <= count_img_up - 1; i++)
{
size_img_up = $('#img_up')[0].files[i].size;
if (size_img_up > 5242880) { // 5242880 byte = 5MB
error_size_img += 1; // Lỗi
} else {
error_size_img += 0; // Không lỗi
}
}
// Kiểm tra định dạng ảnh
for (i = 0; i <= count_img_up - 1; i++)
{
type_img_up = $('#img_up')[0].files[i].type;
if (type_img_up == 'image/jpeg' || type_img_up == 'image/png' || type_img_up == 'image/gif') {
error_type_img += 0;
} else {
error_type_img += 1;
}
}
// Nếu lỗi về size ảnh
if (error_size_img >= 1) {
$('#formUpImg button[type=submit]').html('Upload');
$('#formUpImg .alert').removeClass('hidden');
$('#formUpImg .alert').html('Một trong các tệp đã chọn có dung lượng lớn hơn mức cho phép.');
// Nếu số lượng ảnh vượt quá 20 file
} else if (count_img_up > 20) {
$('#formUpImg button[type=submit]').html('Upload');
$('#formUpImg .alert').removeClass('hidden');
$('#formUpImg .alert').html('Số file upload cho mỗi lần vượt quá mức cho phép.');
} else if (error_type_img >= 1) {
$('#formUpImg button[type=submit]').html('Upload');
$('#formUpImg .alert').removeClass('hidden');
$('#formUpImg .alert').html('Một trong những file ảnh không đúng định dạng cho phép.');
} else {
$(this).ajaxSubmit({
beforeSubmit: function() {
target: '#formUpImg .alert',
$("#formUpImg .box-progress-bar").removeClass('hidden');
$("#formUpImg .progress-bar").width('0%');
},
uploadProgress: function (event, position, total, percentComplete){
$("#formUpImg .progress-bar").animate({width: percentComplete + '%'});
$("#formUpImg .progress-bar").html(percentComplete + '%');
},
success: function (data) {
$('#formUpImg button[type=submit]').html('Upload');
$('#formUpImg .alert').attr('class', 'alert alert-success');
$('#formUpImg .alert').html(data);
},
error: function() {
$('#formUpImg button[type=submit]').html('Upload');
$('#formUpImg .alert').removeClass('hidden');
$('#formUpImg .alert').html('Không thể upload hình ảnh vào lúc này, hãy thử lại sau.');
},
resetForm: true
});
return false;
}
// Ngược lại không chọn ảnh
} else {
$('#formUpImg button[type=submit]').html('Upload');
$('#formUpImg .alert').removeClass('hidden');
$('#formUpImg .alert').html('Vui lòng chọn tệp hình ảnh.');
}
});Viết PHP xử lý dữ liệu
Các bạn tạo cho mình file admin/photos.php và chèn nội dung này vào:
<?php

// Kết nối database và thông tin chung
require_once 'core/init.php';

// Nếu đăng nhập
if ($user)
{
	// Nếu có file upload
	if (isset($_FILES['img_up']))
	{
		foreach($_FILES['img_up']['name'] as $name => $value)
		{
			$dir = "../upload/";
		    $name_img = stripslashes($_FILES['img_up']['name'][$name]);
		    $source_img = $_FILES['img_up']['tmp_name'][$name];

		    // Lấy ngày, tháng, năm hiện tại
		    $day_current = substr($date_current, 8, 2);
			$month_current = substr($date_current, 5, 2);
			$year_current = substr($date_current, 0, 4);

			// Tạo folder năm hiện tại
		    if (!is_dir($dir.$year_current))
		    {
    			mkdir($dir.$year_current.'/');
			}

			// Tạo folder tháng hiện tại
			if (!is_dir($dir.$year_current.'/'.$month_current))
    		{
    			mkdir($dir.$year_current.'/'.$month_current.'/');
    		}

    		// Tạo folder ngày hiện tại
    		if (!is_dir($dir.$year_current.'/'.$month_current.'/'.$day_current))
	    	{
	    		mkdir($dir.$year_current.'/'.$month_current.'/'.$day_current.'/');
	    	}

		    $path_img = $dir.$year_current.'/'.$month_current.'/'.$day_current.'/'.$name_img; // Đường dẫn thư mục chứa file
		    move_uploaded_file($source_img, $path_img); // Upload file
		   	$type_img = array_pop(split("\.", $name_img)); // Loại file
		   	$url_img = substr($path_img, 3); // Đường dẫn file
		   	$size_img = $_FILES['img_up']['size'][$name]; // Dung lượng file

		   	// Thêm dữ liệu vào table
		   	$sql_up_file = "INSERT INTO images VALUES (
				'',
				'$url_img',
				'$type_img',
				'$size_img',
				'$date_current'
		   	)";
		   	$db->query($sql_up_file);
		}
		echo 'Upload thành công.';
		$db->close();
		new Redirect($_DOMAIN.'photos');
	}
    // Nếu tồn tại POST action
}
// Ngược lại chưa đăng nhập
else
{
    new Redirect($_DOMAIN); // Trở về trang index
}
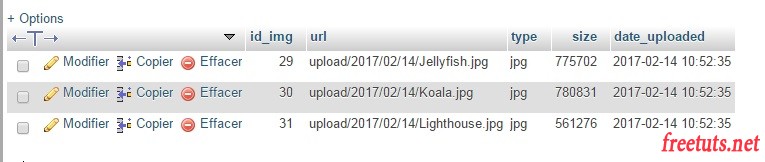
?>Ok! Bây giờ các bạn chạy thử để xem thành quả nào!
Trong folder:

Trong table:
5. Lời kết
Qua bài này chúng đã nắm được khái quát và chức năng hình ảnh, tạo table, phân trang và xây dựng chức năng upload hình ảnh. Ở bài sau, chúng ta sẽ tiếp tục hoàn thành các chức năng của phần này nhé! Nếu có thắc mắc gì các bạn cứ comment bên dưới hoặc đăng bài trên group kèm theo link bài viết để được hỗ trợ nhanh nhất nhé! Cảm ơn các bạn, chúc các bạn thành công!
Danh sách file tải về
| Tên file tải về | Pass giải nén |
|---|---|
| Bài 10: PHP trang tin tức - Các chức năng của hình ảnh admin | freetuts.net hoặc gameportable.net |