 Các hàm xử lý chuỗi trong Javascript (cắt / tách / nối chuỗi ..)
  Chia lấy phần dư / chia lấy phần nguyên trong javascript
  Các cách khai báo biến trong Javascript
  Các sự kiện (Event) trong Javascript
 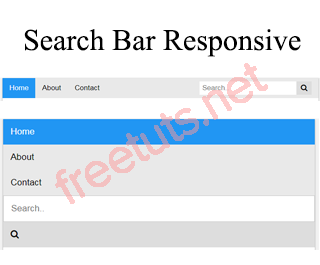 Hướng tạo thanh search bar bằng CSS
  Hàm array.slice() trong Javascript
  Tính tổng hai số bằng Javascript (cộng hai số)
  Cách khai báo biến trong PHP, các loại biến thường gặp
  Download và cài đặt Vertrigo Server
  Thẻ li trong HTML
  Thẻ article trong HTML5
  Cấu trúc HTML5: Cách tạo template HTML5 đầu tiên
  Cách dùng thẻ img trong HTML và các thuộc tính của img
  Thẻ a trong HTML và các thuộc tính của thẻ a thường dùng
 Http service trong Angular 4
Http Service giúp chúng ta thực hiện các phương thức GET, POST với dữ liệu thông qua giao thức HTTP. Để sử dụng Http Service, chúng ta cần import http module . Hãy cùng đi vào một vài ví dụ cụ thể để hiểu hơn về Http Service nhé.

Các bước sử dụng Http Service
Để sử dụng http service, trước tiên ta cần thực hiện 2 bước:
Bước 1: Import HttpClientModule vào module
Bước 2: Khai báo và sử dụng HttpClient trong component
Bài viết này được đăng tại [free tuts .net]
Ví dụ sử dụng http service
Trong ví dụ này, chúng ta sẽ lấy dữ liệu từ trang http://jsonplaceholder.typicode.com/users - một trang mockup dữ liệu cho chúng ta test, sau đó log ra console và hiển thị lên giao diện.
Import http service
import { BrowserModule } from '@angular/platform-browser';
import { NgModule } from '@angular/core';
import { RouterModule } from '@angular/router'
// Import http module
import {HttpClientModule} from '@angular/common/http';

import { AppComponent } from './app.component';
import { NewCmpComponent } from './new-cmp/new-cmp.component';
import { FormsModule } from '@angular/forms';
import { ChangeTextDirective } from './change-text.directive';
import { SqrtPipe } from './app.sqrt';
@NgModule({
  declarations: [
    AppComponent,
    NewCmpComponent,
    ChangeTextDirective,
    SqrtPipe
  ],
  imports: [
    BrowserModule,
    FormsModule,
    // Khai báo http module
    HttpClientModule,
    RouterModule.forRoot([
      {
        path: 'new-cmp',
        component: NewCmpComponent
      }
    ])
  ],
  providers: [],
  bootstrap: [AppComponent]
})
export class AppModule { }
Sử dụng http service trong app component
Sửa nội dung của file app.component.ts như sau
import { Component } from '@angular/core';
import { HttpClient } from '@angular/common/http';
@Component({
selector: 'app-root',
templateUrl: './app.component.html',
styleUrls: ['./app.component.css']
})
export class AppComponent {
results;
constructor(private http: HttpClient) { }
ngOnInit() {
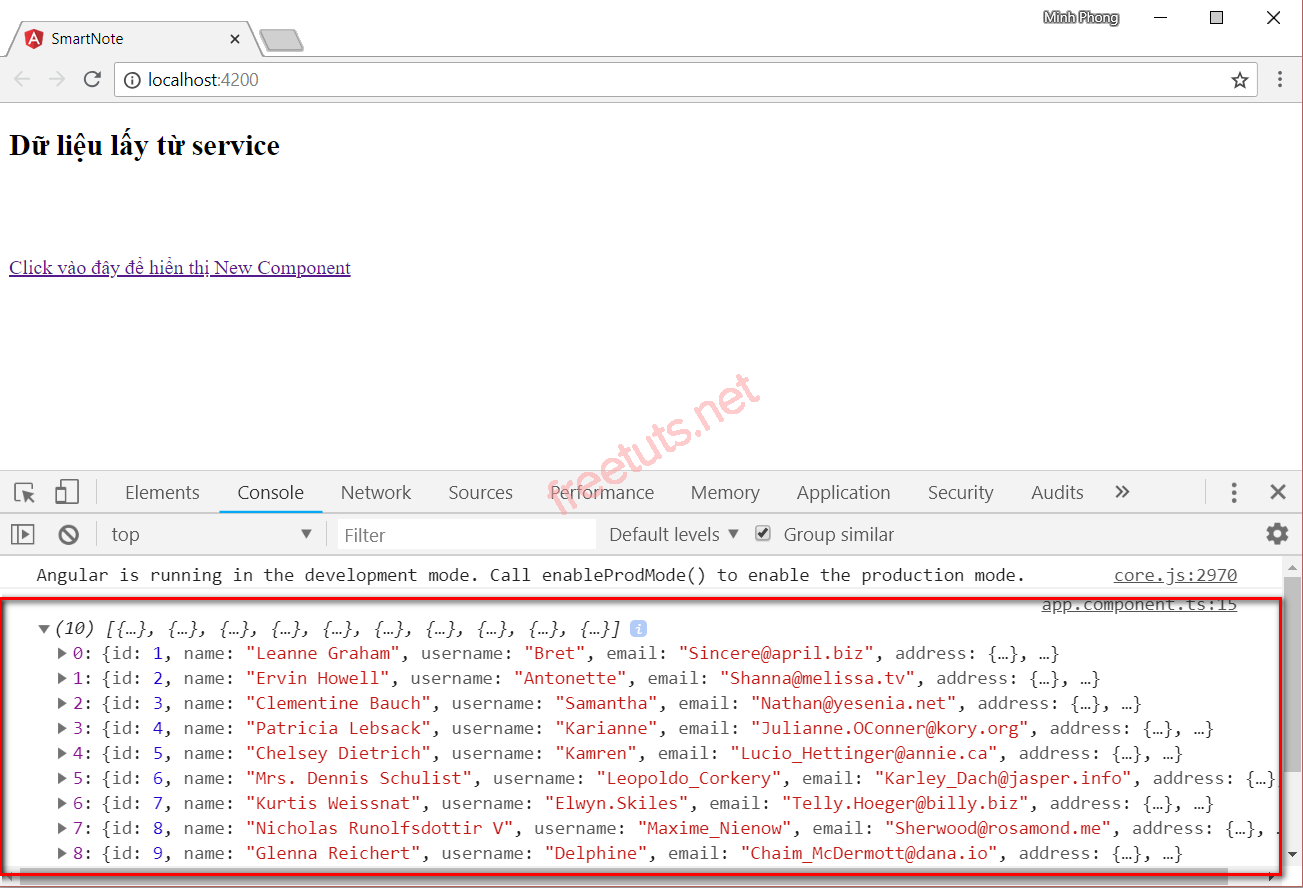
this.http.get("http://jsonplaceholder.typicode.com/users").subscribe(data => {
console.log(data);
this.results = data;
});
}
}Phương thức this.http.get() tạo ra 1 get request đến địa chỉ http://jsonplaceholder.typicode.com/users. Khi dữ liệu trả về, ta thực hiện xử lý dữ liệu thông qua phương thức subscribe
 this.http.get("http://jsonplaceholder.typicode.com/users").subscribe(data => {
            console.log(data);
            this.results = data;
        });
Khi thực hiện được request xong thì phương thức subscribe chịu trách nhiệm xử lý tiếp. Ở đây, subscribe sẽ log dữ liệu ra console như hình dưới
Hiển thị dữ liệu ra view
Để hiển thị dữ liệu ra view, ta thực hiện 2 bước:
Bước 1: Khai báo biến để chứa dữ liệu mà http service trả về.
Bước 2: Bind dữ liệu ra view
Ở phần trên, dữ liệu trả về của http service đã được lưu vào biến results. Giờ nhiệm vụ của chúng ta là hiển thị dữ liệu ấy ra.
Cùng nhìn vào dữ liệu của một bản ghi:
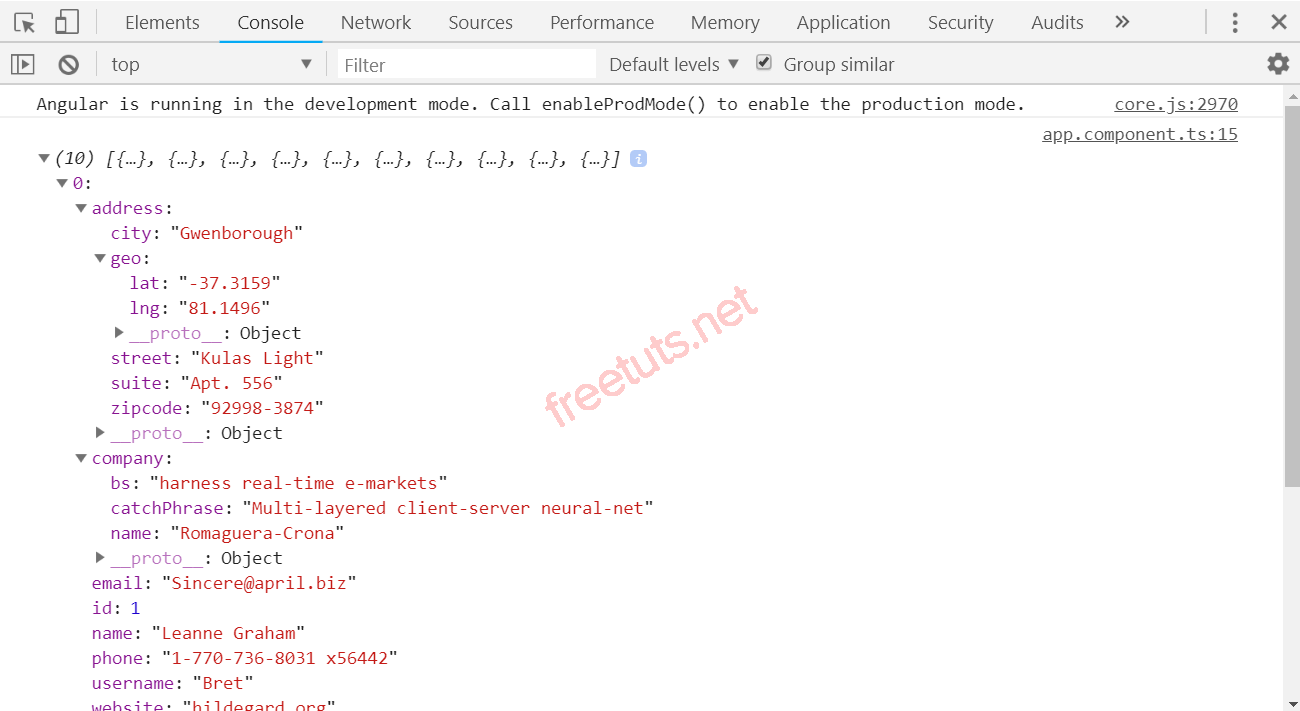
Dữ liệu có id, name, email, phone, username, website và address. Address lại có các thuộc tính city, street, suite. Chúng ta sẽ hiển thị dữ liệu này dưới dạng bảng nhé.
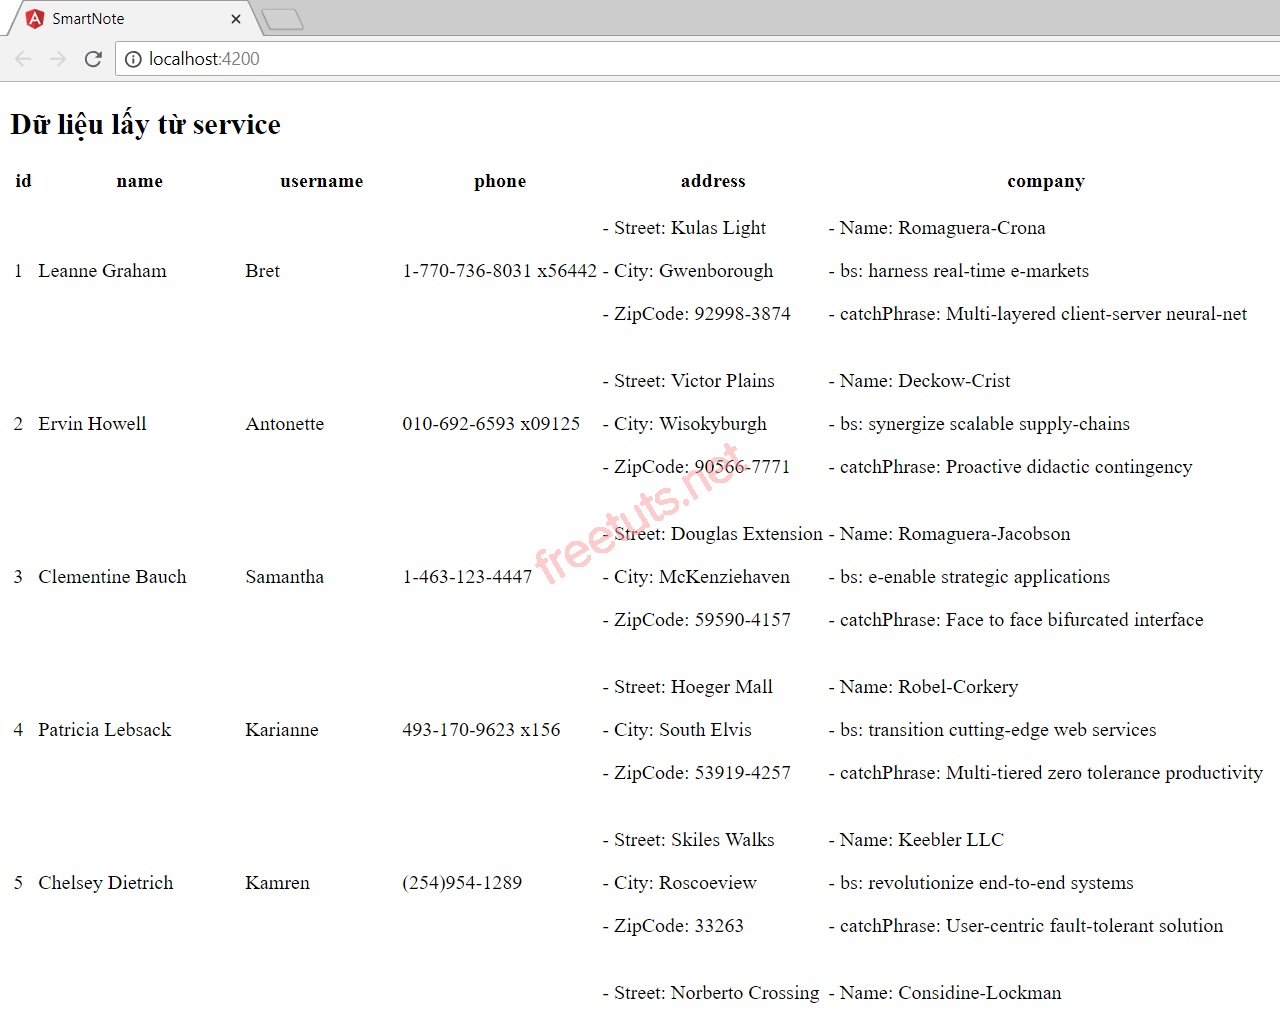
Sửa nội dung file app.component.html
<h2>Dữ liệu lấy từ service</h2>
<table>
    <thead>
        <tr>
            <th>id</th>
            <th>name</th>
            <th>username</th>
            <th>phone</th>
            <th>address</th>
            <th>company</th>
        </tr>
    </thead>

    <tbody>
        <tr *ngFor="let user of results">
            <td>{{user.id}}</td>
            <td>{{user.name}}</td>
            <td>{{user.username}}</td>
            <td>{{user.phone}}</td>
            <td>
                <p>- Street: {{user.address.street}}</p>
                <p>- City: {{user.address.city}}</p>
                <p>- ZipCode: {{user.address.zipcode}}</p>
            </td>
            <td>
                <p>- Name: {{user.company.name}}</p>
                <p>- bs: {{user.company.bs}}</p>
                <p>- catchPhrase: {{user.company.catchPhrase}}</p>
            </td>
        </tr>
    </tbody>
</table>
Ta sử dụng kĩ thuật data binding đã học trong bài trước để bind dữ liệu từ mảng result ra view. Đối với company và address có các dữ liệu con bên trong nên ta sẽ hiển thị trên nhiều dòng của cùng một ô.
Chạy chương trình, ta thu được kết quả
Nội dung bài học về http service đến đây là hết rồi. Hẹn gặp lại bạn trong bài sau nhé.
Danh sách file tải về
| Tên file tải về | Pass giải nén |
|---|---|
| Tải source code | freetuts.net hoặc gameportable.net |